Detail Pages
This topic is not part of the published manual for this version. It is kept in the repository but does not appear in the navigation, the search or the sitemap.
Open a row in a list view and you land on a detail page: one record, shown in full. Items, resources, material groups, work orders and the master-data records all use the same frame.
This topic explains the parts every detail page has in common. The individual topics describe what is specific to their record — which tabs it has and what its fields mean.
Anatomy of a detail page
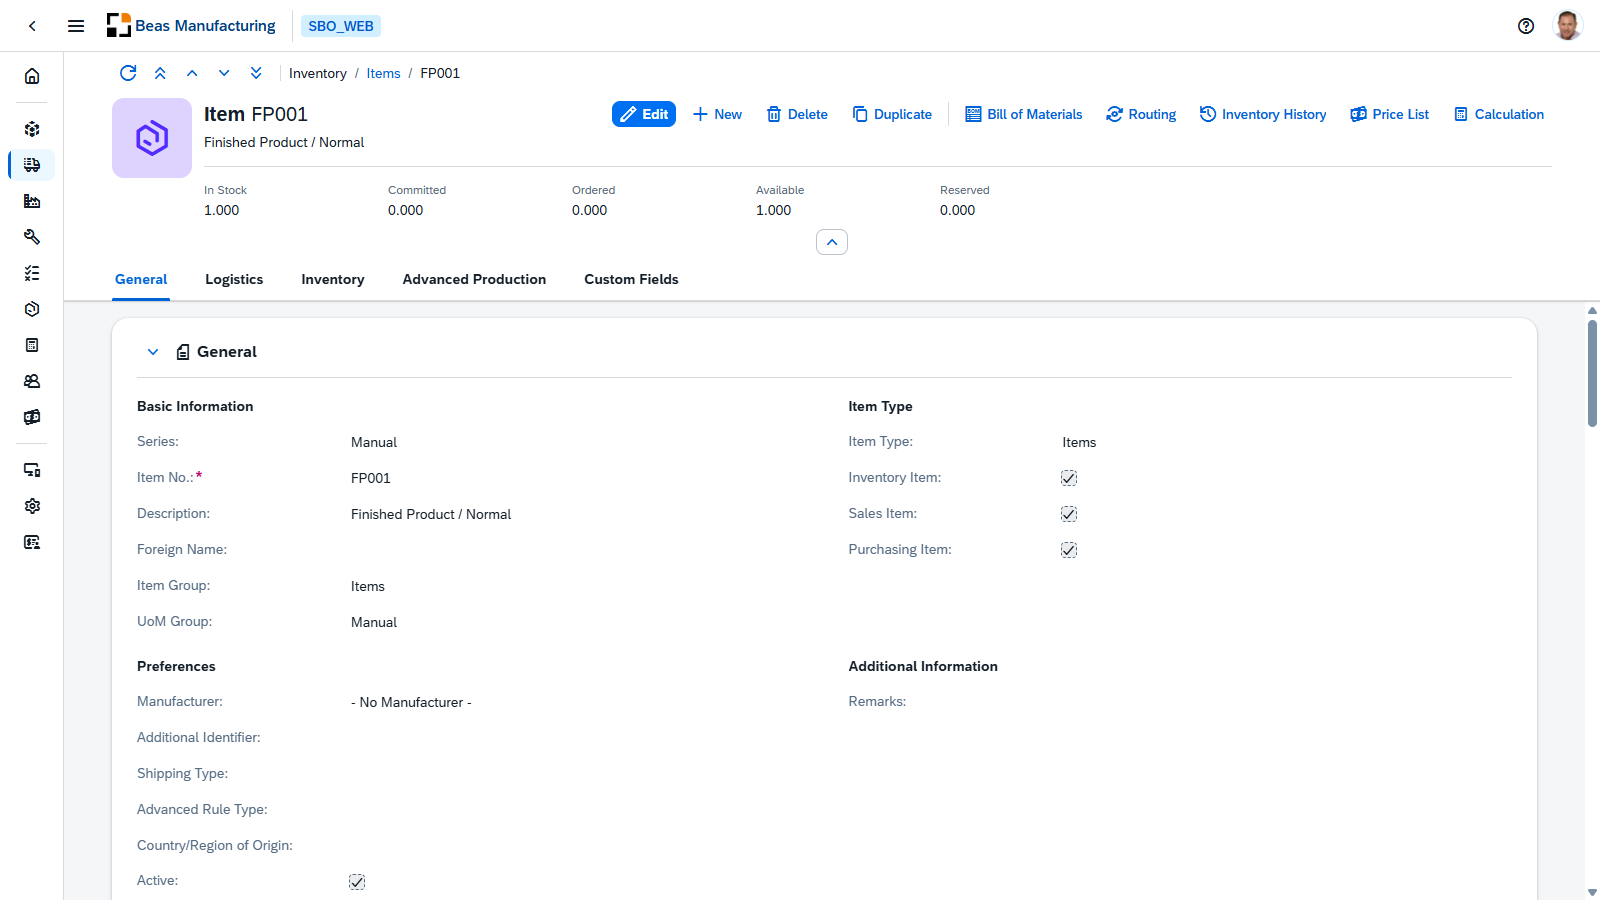
| Region | What it is for |
|---|---|
| Position navigation | Move to another record without going back to the list. |
| Breadcrumb | Where you are, and a way back to the list. |
| Title | What kind of record this is and which one, with a subtitle underneath. |
| Header actions | What you can do with the record (see below). |
| Header facts | The few numbers worth seeing before anything else — on an item, its stock figures. |
| Collapse | Fold the header away to give the content the whole screen. |
| Tabs | The groups the record's fields are split into. |
| Sections | Collapsible blocks of fields inside the active tab. |
Moving between records
The arrow buttons at the top left step through the records without going back to the list. They follow the record's own key order — the item code, the work order number — not the sort, filters or paging of the list you came from. Sort a list by quantity, open the top row and press Next, and you get the next code rather than the next row you were looking at. The buttons, and the Refresh action next to them, are described under Navigation bar in General Controls.
Header actions
The buttons in the header are the actions on the record itself:
| Action | What it does |
|---|---|
| Edit | Switch the page into edit mode so the fields become editable. |
| New | Start a blank record of the same kind — see Creating a record. |
| Delete | Remove this record, after a confirmation. |
Anything after those is specific to the record. On an item, for example, the header also offers Duplicate — a new item pre-filled from this one — and opens its Bill of Materials, Routing, Inventory History, Price List and Calculation, each a related screen for the record you are on. Which of these a screen has depends on the record: Duplicate is offered on about half of them, not everywhere.
Which actions you see depends on your permissions. With read-only access to a screen the editing actions are not offered.
Tabs and sections
A record with many fields is split into tabs, and each tab into sections. Sections collapse with the chevron next to their heading, so you can fold away the parts you are not working on and keep the ones you are.
Within a section, fields are laid out in labelled groups — on the item's General tab, Basic Information, Item Type, Preferences and Additional Information.
Viewing and editing
A detail page opens in view mode. Nothing you do can change the record until you choose Edit.
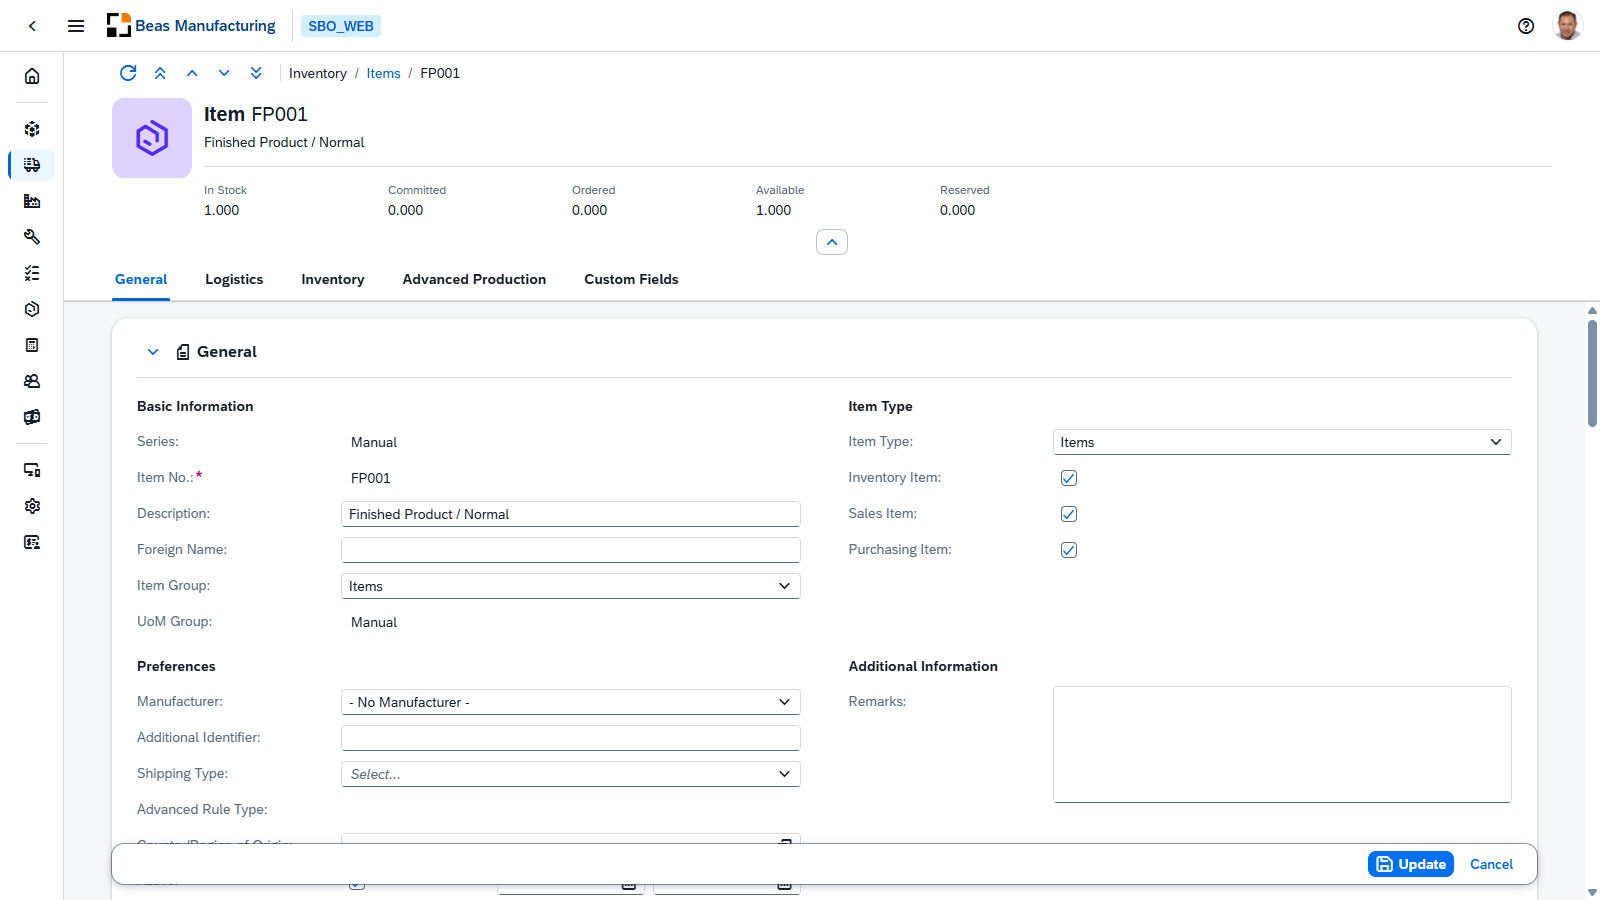
In edit mode:
- Editable fields turn into input boxes, dropdowns and checkboxes. Fields the record does not let you change stay plain text — on an item, its Series, Item No. and UoM Group.
- A red asterisk on a label marks a field that must be filled in.
- A footer bar appears with Update to save your changes and Cancel to drop them.
Cancel asks you to confirm before discarding what you changed, and closing or reloading the browser tab warns you too.
Moving to another record — with the arrow buttons — leaves edit mode without asking, and the changes are gone. Save before stepping away.
Creating a record
New in the header of a detail page — or the button in a list view's grid toolbar — opens an empty form, titled for the kind of record you are adding. It is the same page in the same layout, with every editable field blank and the required ones marked with a red asterisk.
What differs is the footer. Instead of Update you get a split button, because after adding a record there is more than one sensible place to end up. This is the standard create footer throughout the application.
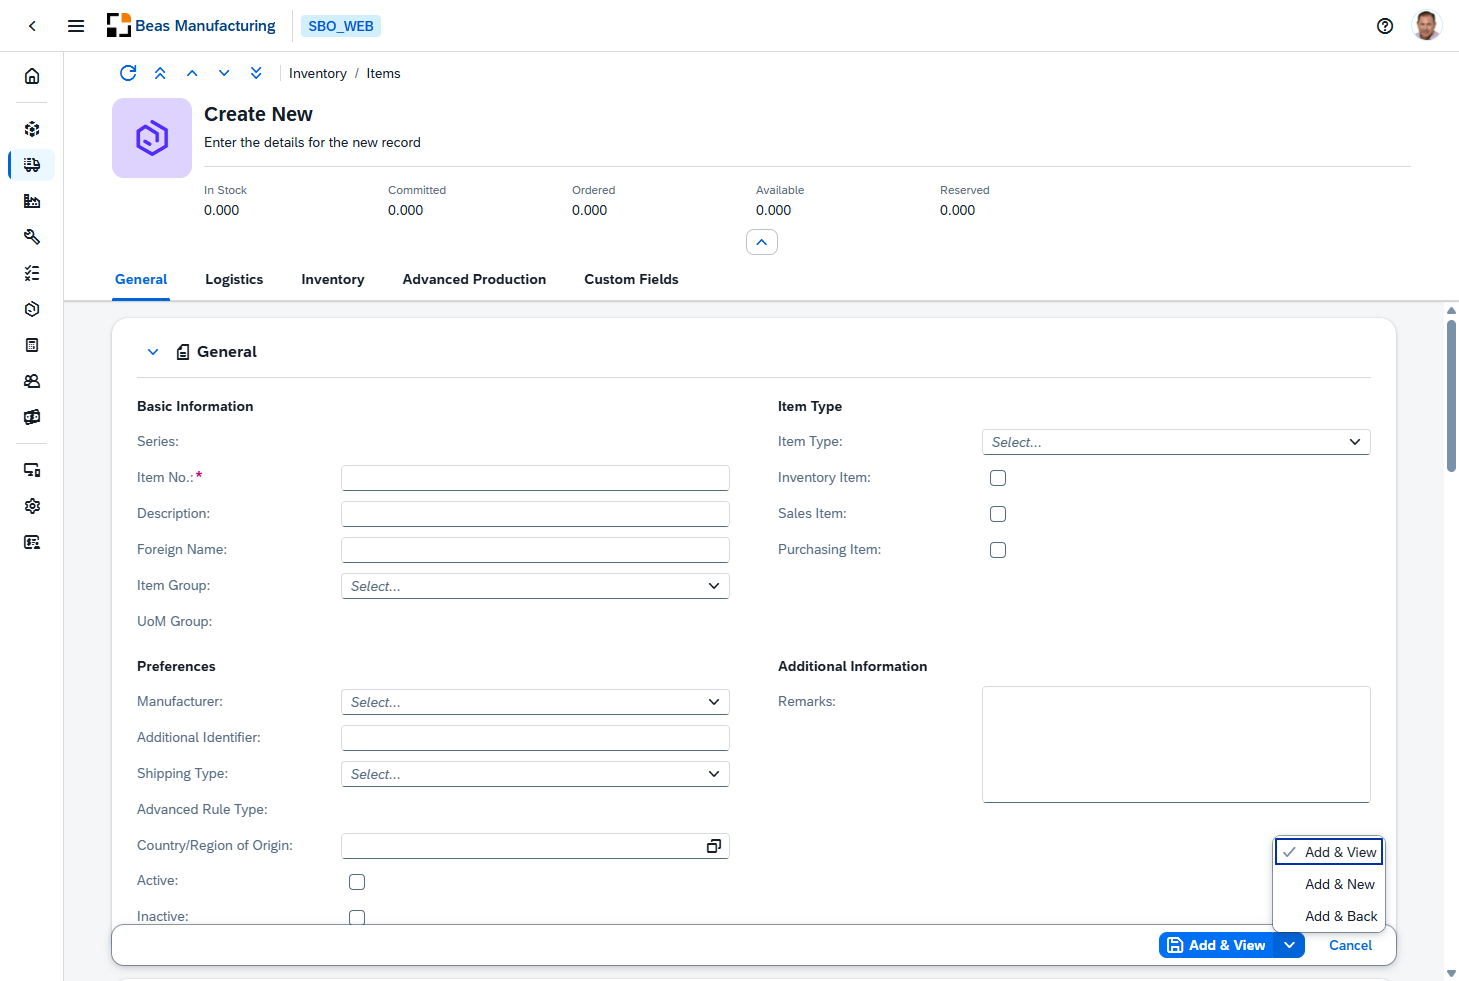
| Action | Saves the record and then… |
|---|---|
| Add & View | Opens the record you just created, so you can check it or keep working on it. |
| Add & New | Clears the form for the next record. Use this when entering several in a row. |
| Add & Back | Returns to the list you came from. |
The main button carries out the action written on it. To use one of the others, open the menu with the arrow and pick it — picking one of these three saves the record straight away, it does not just change the default.
The action you pick becomes the button's default for that kind of record from then on: choose Add & New once while adding items and the item form keeps offering Add & New next time. Each kind of record remembers its own choice.
The default is remembered in the browser you are working in, so it does not follow you to another computer.
Time Receipts is the exception. Booking a receipt is itself a choice — Partial Receipt or Confirm Completion — so its split button offers those two instead, and always opens the receipt it just booked. Its menu behaves the other way round: picking one of the two only re-labels the main button, and nothing is booked until you press it.
Cancel leaves without creating anything and takes you back to the list.
Related screens
Where a record has children — an item's bill of materials, a work order's operations — the header action opens them as their own screen, usually a list view scoped to the record you came from. The breadcrumb keeps the trail back.