You should now be able to define your budget. This is done under Financials > B1 Budget > Budget Entry
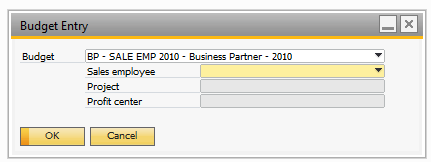
All depending if you decided for your budget to use Sales Employee, Project and Profit Center, but need to choose the budget to work on and if needed choose Sales Employee, Project and/or Profit center. (You are not allowed to continue until you have done so). Once selection is in place you will see the following window.
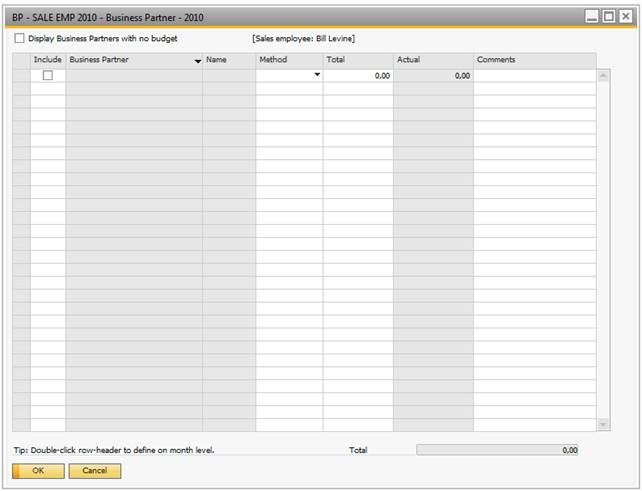
Right now we don’t have any data defined yet so we need to press the “Display Business partners with no budget” in order to show all Business Partners that is possible to define a budget for (Where Include in B1 Budget UDF is set to Yes)
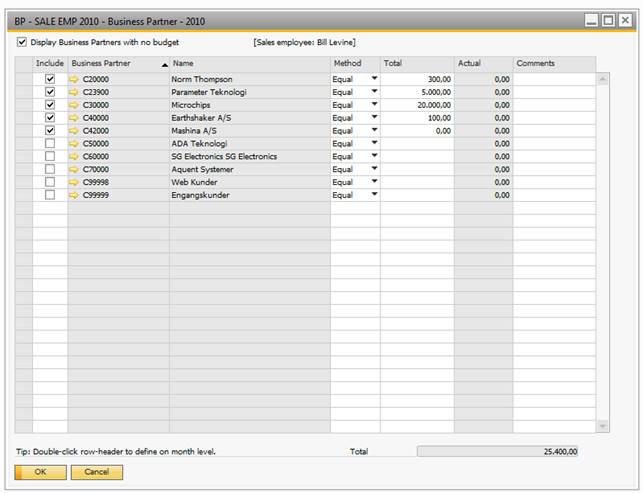
We now see all relevant business partners and we can define budget values for each of them. You add a budget-value by choosing a distribution method and simply entering the value in local currency it in the Total Column. This will automatically check the “Include” checkbox. The “Include” checkbox can also be used if you wish to include a business partner in the budget without defining a budget value.
If you wish to be more specific on how the total budget-value is distributed over the months of the year you can double-click on the row-header to bring up the month-level view.
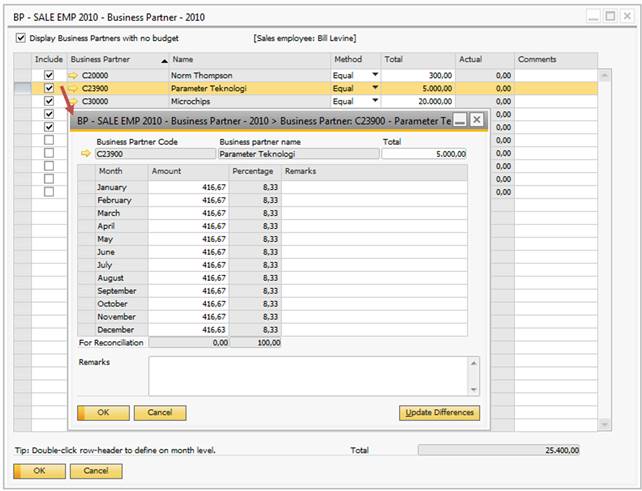
Here you can maunally distribute the total onto the different months. The total amount always need to match the sum of the months (Use the Update Differences button to automatically distribute the missing values to the last month).
Once happy with the budget you press update to save the selection (You can always come back to it later to re-define it if needed). Also the Acual value will now show the year so far compared to the budget value.
NB: Defining budgets for items and the groups works in the same manner.