|
The Process Flow Editor allows you to edit the out of the box flows or create brand new.
NB: In order to do this you need to be a B1UP Superuser (normal user will not see these options)
In order to open the Process Flow Editor, press the ... button in the upper right corner of the Widget.

The Create New... and Edit... options works in the same way so here we will use Edit as an Example.
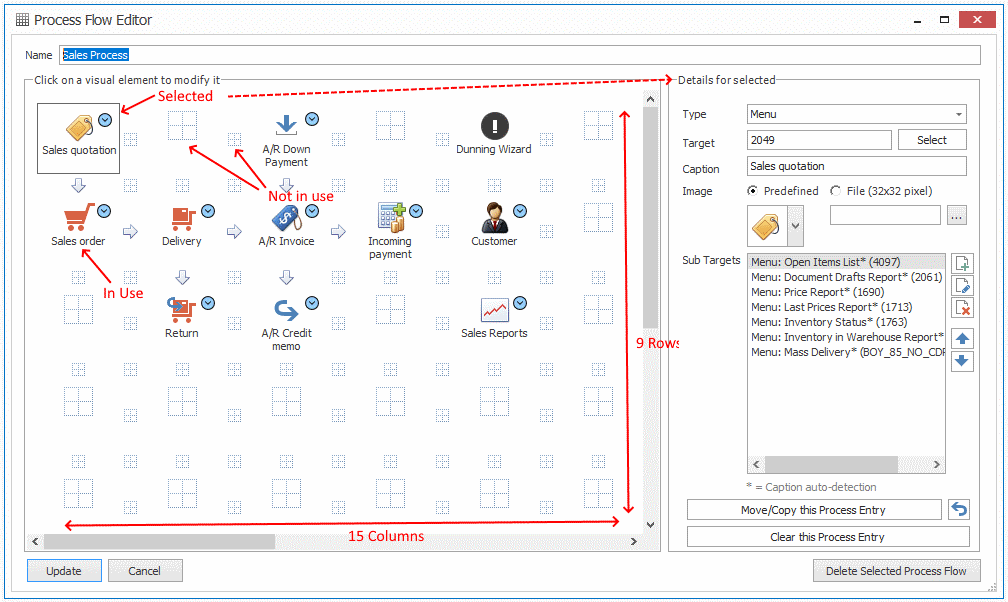
When the Process Flow Editor is open it will present you with a 15 column by 9 Row's Grid where you can define you Process Flow. You simply click on one of the visual element (existing or empty indicated by the outline image) and edit on the right-hand side of the editor
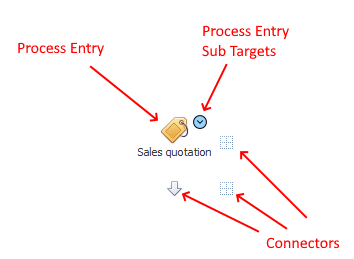
Terminology Definition:
Details Type
|
Description
|
Process Entry Details
|
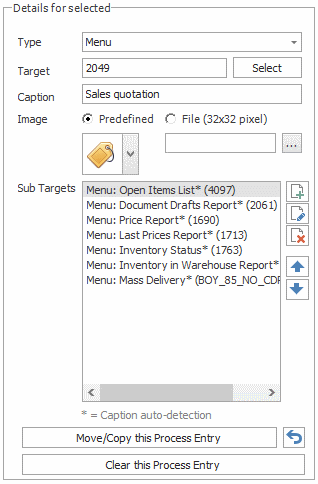
Here you define how the Process Flow Entry should look like. You will at minimum need to define a Caption or an Image before an entry is seen as being configured (aka saved)
Field
|
Description
|
Type/Target
|
Her you define the target of the Process Entry. You can either Choose a Menu-item to launch or a Universal Function to Launch.
Tip: It is no Mandatory to have a Target for a Process Entry. You can leave it blank and instead only define Sub Targets (see below). If you do that the Process Entry will if pressed show the Sub-Targets List (Often used on a Reporting Process Entry that should present a series of reports to choose from but none of them should be the default)
Tip: if you want to open a UDT or UDO, then manually enter @MYUDT or @MYUDO as a menu-item and the system will automatically auto-correct
|
Caption
|
Here you define the Caption of the Process Entry.
Tip: It is not mandatory to have a Caption (you can show the Image only if you wish to do so)
|
Image
|
Here you choose the image of the Process Entry.
You can choose one of the predefined images from the list or provide your own 32x32 pixel png image
|
Sub Targets
|
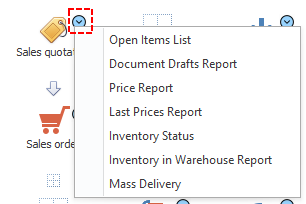
Her you define the Sub Target... aka what is under the Sub Menu when you press it
You Add/Edit/Remove or Move Up/Down the Sub Targets using the 5 buttons left of the List
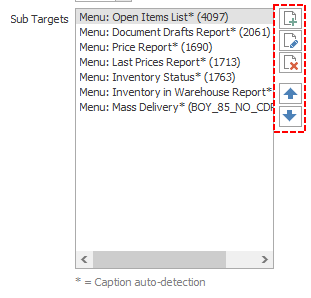
On Add and Edit You are Presented with the Sub Target screen that work exactly the same ways as the Target-selection in the Process Entry
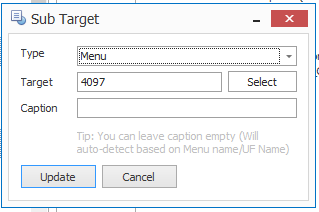
Tip: if you want to open a UDT or UDO, then manually enter @MYUDT or @MYUDO as a menu-item and the system will automatically auto-correct
|
Move/Copy this Process Entry
|

With this button you can move an entire process from one cell in the grid to another.
When pressed you are presented with this screen
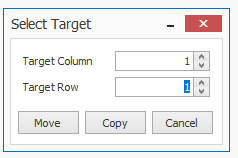
Simply choose a column and row to move (move and empty current) or copy (make current and target have same data).
Warning: Any current data in the target cell will be lost. If you by mistake moved a process to an unwanted position you can press the undo button to revert the move/copy
|
Clear Process Entry
|
Click this button if you wish to revert this process entry to an empty process entry (aka nothing visible)
|
|
Process Connector Details
|
Here you define what image the connector (Arrows are the most normal but other images are also available)
You can choose from the predefined list or provide your own 16x16 pixel png images
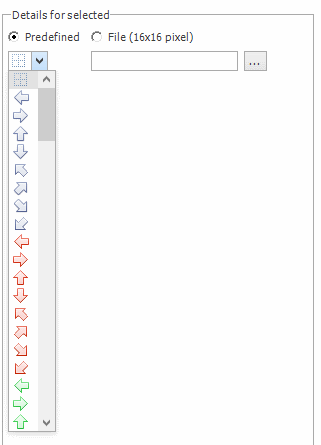
Connectors have now functionality other that their visual appearance and are not required as such.
|
|