You have now selected the Business Partners you wish to modify and the next step is to decide what data you wish to modify. You have a lot of options here, but they can be divided into 5 types of modifications that will now be explained with a few samples:
NB: PLEASE NOTE THAT THIS STEP ONLY SELECTS THE MODIFICATIONS WHILE STEP 4 IS THE ONE EXECUTING THEM.
TIP: YOU CAN CHOOSE MORE THAN ONE MODIFICATION TO HAPPEN ON THE SAME TIME IF NEEDED.
Modification via a combo box-selection
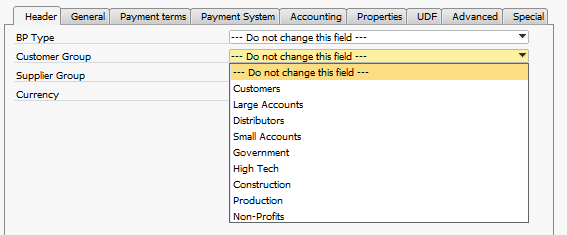
This is the most common modification. As default all fields that are changed in this way start on the value “--- Do not change this field ---” which is the indication that no changes will be made. Should you as an example wish to change the customer group on the selected business partners you simply choose the new group that should be applied to all of the partners. (As you might have guessed if some of the business partners in the current selection are suppliers they will of cause not need a customer group (they need a supplier group and will therefore ignore the selection)).
Modification via a checkbox + entered value selection
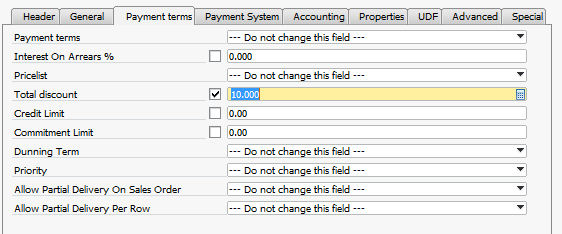
Some common values cannot simply be chosen from a dropdown list like a customer group. An example here is that if you wish to give all selected Business Partners a certain total discount, it will need you to put in the value. Such modification happens in a field where you enter the value and tick on what you wish to modify to the entered value. (The tick of the checkbox is needed due to the fact that you might in the example wanted to set all Total discounts to 0 and in such a case, only the checkbox could indicate if you wished to set the value to zero or make no change (0 also being the ignore value)).
Modification of properties
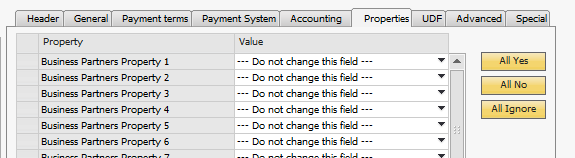
Modification of the 64 properties works in the same manner as Modifications via combo box but with a slightly different interface that provides buttons for quickly marking each property as yes, no or ignore.
Modifications of user-defined fields
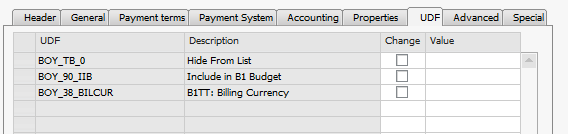
You also have the option to modify the User-defined fields (UDF). This works in the same way as Modification via checkbox + value. Simply tick on the UDFs you wish to modify and provide a value for them.
TIP: IT IS POSSIBLE IN THE VALUE TO WRITE PROPERTY:<NAME OF SDK BP PROPERTY> TO GET THE VALUE FROM AN EXISTING FIELD: EXAMPLE: PROPERTY:CARDNAME
TIP: IT IS POSSIBLE IN THE VALUE TO WRITE SQL:<’SQL SENTENCE> TO GET THE VALUE FROM AN EXISTING FIELD. YOU CAN USE DOCKEY@ TO REFER TO THE CURRENTLY UPDATING PRIMARY KEY: EXAMPLE: SQL:SELECT COUNT(*) FROM OINV WHERE CARCODE = ‘DOCKEY@’
TIP: Dates should be formated like yyyy-mm-dd - 2016-09-20
Advanced
On the advanced tab you have access to all header level property fields in the SDK (Should your specific field not exist as an out of the box selection)
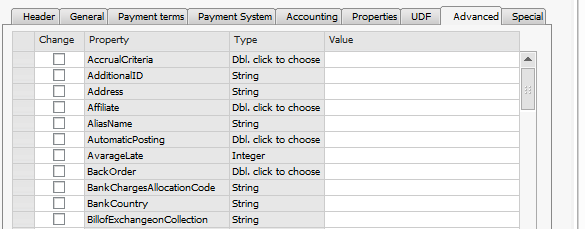
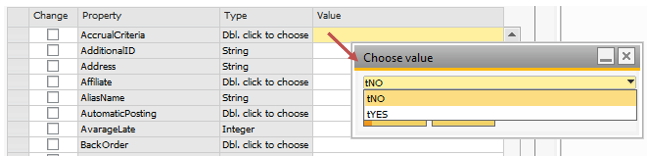
For fields that require enumerations you can double-click to get the correct value:
TIP: IT IS POSSIBLE IN THE VALUE TO WRITE PROPERTY:<NAME OF SDK BP PROPERTY> TO GET THE VALUE FROM AN EXISTING FIELD: EXAMPLE: PROPERY:CARDNAME
TIP: IT IS POSSIBLE IN THE VALUE TO WRITE SQL:<SQL SENTENCE> TO GET THE VALUE FROM AN EXISTING FIELD. YOU CAN USE DOCKEY@ TO REFER TO THE CURRENTLY UPDATING PRIMARY KEY: EXAMPLE: SQL:SELECT COUNT(*) FROM OINV WHERE CARCODE = ‘DOCKEY@’
Tip: Not seing the needed DI-API Property? Read more here
Special tasks

Last tab in the modification options provides special tasks, like deleting selected business partners. These tasks are executed when the button is pressed and does not involve step 4’s execute button (but it does apply the transaction option from step 4).
Reset all settings
![]()
You have the option to reset all the current selection of settings using this button (You will also be asked if you wish to do it if you press the Find button multiple times). If you selected yes to reset all settings all current selections for modification will revert back to their default state (same as when opened the window).